Connecting CTS602 to LAN
Although we recommend that you hire a professional to set up the hardware connection, you can of course do it yourself by following the instructions below. For specific configurations other than those described here, please refer to the documents on the Nilan website. Do not hesitate to contact me in a comment or by e-mail if you encounter any problems or you have managed to configure your device in a different way to the one described here, or if you need clarification or additional information. I will try to keep this page up-to-date with new information.
Hardware requirements
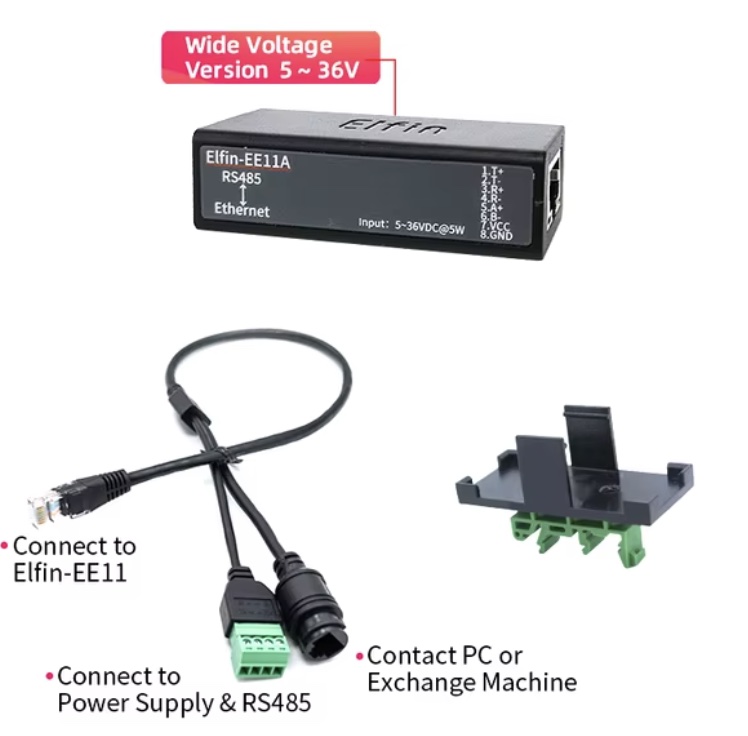
In order to connect the Nilan CTS602 controller to the LAN network, you will need an RS485-TCP gateway. I tested it with ELFIN EE11A and EW11A devices (the A end is important if you want to connect the power supply from Nilan). I recommend buying it with the accessories shown in the following picture:

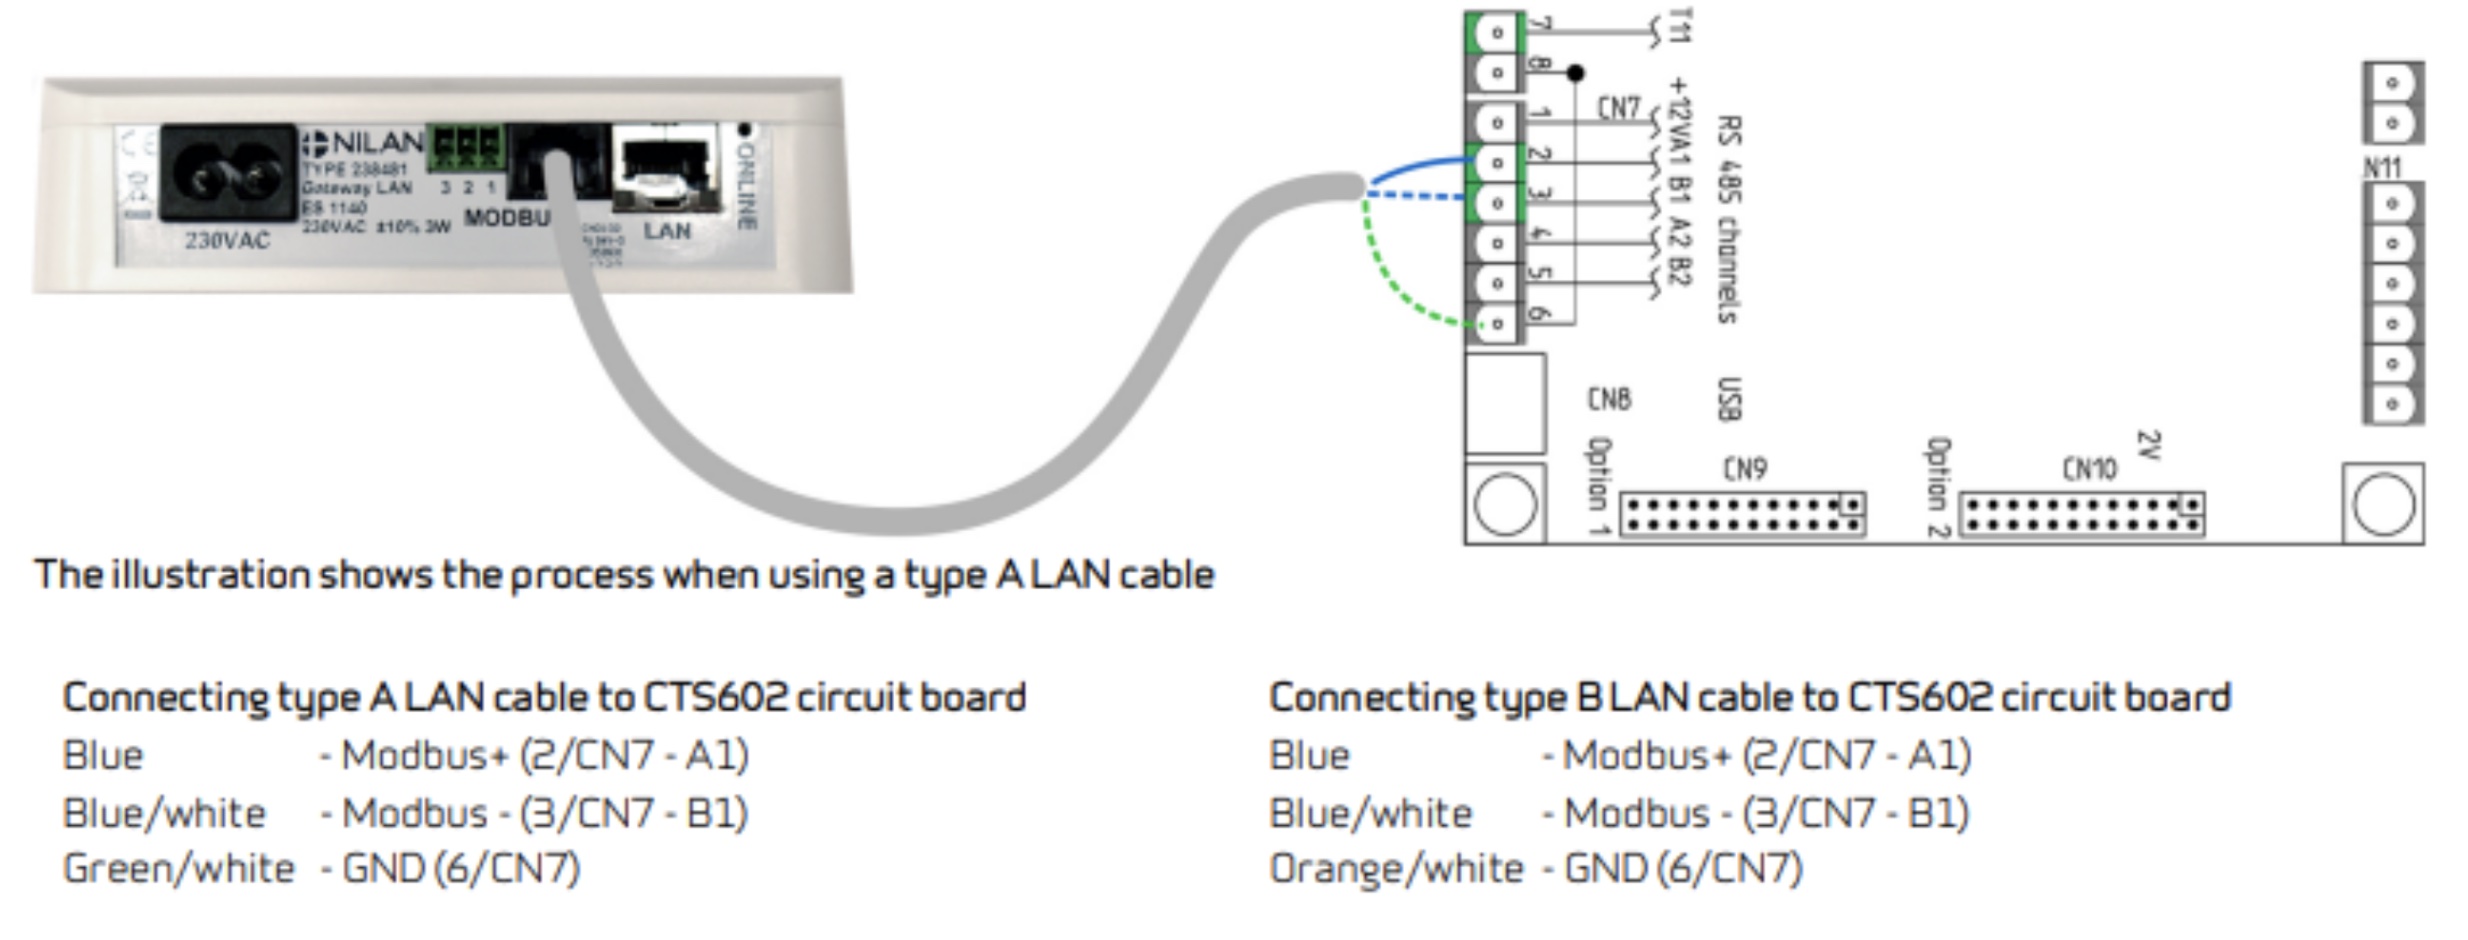
For the wireless model, the conversion cable is similar:

Wiring
On the black plastic part of the conversion cable’s connector you can see the following markings: A, +, - and B, annotating the Modbus A, 5-36VDC power, ground and Modbus B accordingly.
These markings can also be found on the Nilan machine, to which the appropriate wiring of the gateway must be connected. There are two possible hardware configurations:
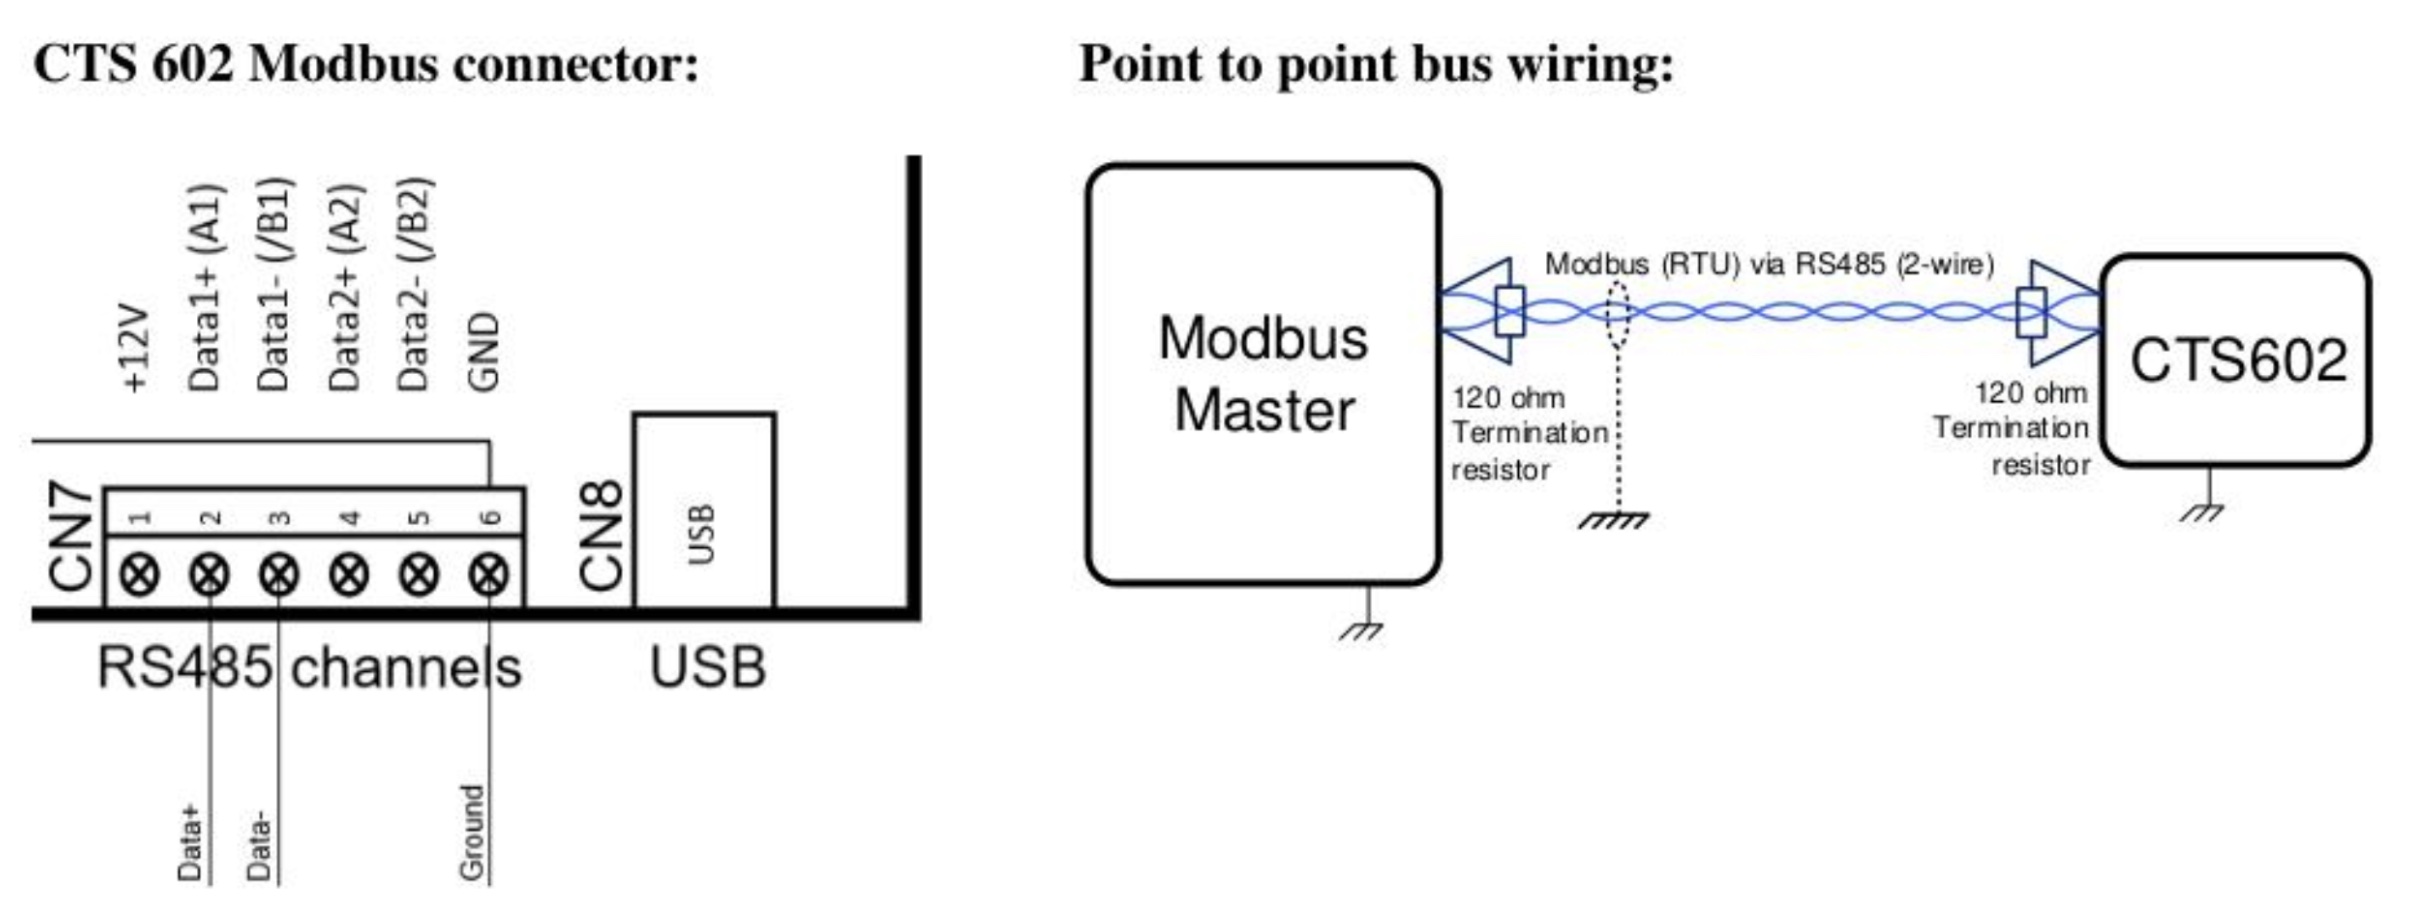
- If no additional motherboard is connected to the Nilan machine, we can connect the RS485-TCP gateway to the Modbus interface of the standard motherboard (CN7 connector), according to the Nilan documentation. Beside Modbus A and B (2nd and 3rd pin), there are grounding and power (6th and 1st pin) on connector CN7, too.
 Alternatively, you can plug the gateway into the 8-pin connector on top of the machine. Make sure that the power is connected to the 8th pin (or connect a separate power supply).
 Don’t forget to terminate both ends of the data bus (wires A and B) with 120Ω resistors. The wiring options are summarized in the following table:
Elfin cable explanation CN7 connector 8 pole connector A Modbus communication wire A 2 6 + DC power 12 VDC 1 8 - ground 6 1 B Modbus communication wire B 3 7 - If there is an additional motherboard and a so-called MB gateway on top of the machine, we recommend to connect the RS485-TCP gateway device to the additional motherboard in place of the Nilan gateway. Two Modbus masters cannot be wired to one Modbus, so we cannot use Nilan’s and our own gateway at the same time without investing in other hardware, but our QuickApp solves both the remote monitoring and the control via mobile application functions, so the MB gateway is not needed. In fact, the external CTS602 motherboard also has a 6-pin connector marked CN7. The gateway is connected to it in the same way as to the internal motherboard. Therefore we have to do the same. Don’t forget to attach power supply.

Configuring the Gateway
Configuring elfin is quite simple on the web interface. The LAN type (EE11A) automatically connects to the LAN network via DHCP, and the Wifi type (EW11A) creates its own Wifi network for configuration. 0. To do the latter, connect to the gateway’s own Wifi network and then log in to the web interface using the default IP address (10.10.100.254). The default user/password is admin/admin. Enter the connection details for your own Wifi network
- Change the admin username and password, and reboot the device.
- Now configure the Serial port with the following parameters:
- Baud Rate: 19.200
- Data Bit: 8
- Stopbits: 1
- Parity: Even
- Buffer Size: 512
- Gap time: 50
- Flow Control: None
- Protocol: switch off Modbus protocol (it doesn’t work)
- In Communication settings, set the followings
- leave Basic settings as is (512, 60, 0)
- Protocol: Tcp server
- Local port: 502 default modbus port is recommended
- Security: Disable
- Route: Uart
Setup QuickApp
It is recommended to fix the IP address of the gateway in the router settings. Don’t forget to setup host and port QuickApp variables to reflect to your gateway IP address and port.
Resources
- Elfin-EE1X User Manual
- Nilan’s LAN Gateway documentation
- Nilan’s Wifi Gateway documentation
- Other Nilan documentations
Note: Proper installation may require professional assistance, especially when configuring hardware connections. Always refer to official Nilan documentation and consult with professionals when necessary.